Showing posts with label Tablets. Show all posts

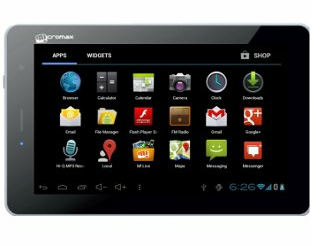
How to root Micromax Funbook Infinity P275: complete process


Micromax Funbook Infinity P275 is a smart tablet among all Funbook’s by Micromax. Like other tablets, it is too a source of well features specs that are moulded with eye catching design. From the specs point of view, it comes with a 7 inch TFT LCD display that generates views at 800x480 pixels resolution.

It runs on Android ICS OS. MMX has kept all its tablets (almost) glued with Android ICS OS. This is the main reason why people look for rooting and custom ROMs for them. After announcing these handy featured machines, MMX used to forget their after launch developments. They are focusing only on Canvas series these days. That is good for Canvas users but what about Funbook users? Are they not eligible of such timely updates? Or they have done some crime because of what MMX is not awarding them any official update? Whatever be the reason but one thing is sure that MMX will never care about such gadgets. But don’t worry here comes the custom developers to play.

Now you can root your Micromax Funbook Infinity P275 with a custom developed tool. Here I am going to discuss that tool in detail. But please remember that it will void your warranty which means no more official claim after rooting. But talking about the features then rooting will add extra protection, better speed to your P275. Moreover you will be able to manage its content with professional tools. So all in all rooting is a 50-50 game where you have to lose something for getting better access. Also please follow all the steps very carefully. Rooting is a dangerous process that might even damage your tablet.

How to root Micromax Funbook Infinity P275

1. BATTERY SHOULD BE AT LEAST 70%.
2. USB as debugging must be ticked in your tablet. To tick it, go to Settings>>Developments menu.
3. Now download the rooting tool from here. Download it to your computer.
4. Connect your P275 with computer through USB chord. Try to use orginal USB here.
5. Extract the downloaded rooting folder and open the RunMe.bat file (you will find it in the extracted folder).
6. Now press “1” in the command prompt you will get thereafter.

That’s it! Rooting process will now start. Just wait for it to get finished. Now remove the USB chord and reboot your Micromax Funbook Infinity P275 again. You may even check rooting status with help of Root Checker app from Play Store.


ADVERTISMENTS

How to root Micromax Funbook Talk P360 through offline tool


Micromax Funbook Talk P360 is an Android 4.0 ICS tablet from company. This tablet comes with normal specs that include Cortex A8 processor with 1 GHz CPU and 1 GB RAM. Here 1 GB RAM is something attractive which surely takes multi-tasking pleasure to next level. Along with these two features, it also comes with 2 GB ROM, 2 MP rear and VGA front facing camera.

It provides a healthy user interface through 7 inch WVGA screen. It couples 2G voice calling facility in 7 inch machine which is a wonderful thing. It is one of the best voice calling enabled tablet by Micromax (even all companies in India). It retails at normal price (Rs. 6,700) which further magnifies all the things further. It also gives the option to access 3G speeded internet through USB dongle.

So all in all it is a super device which contains most of the essential features inside. But if you still want some next level customizations in your MMX Funbook Talk P360 then you will have to take help of rooting. Rooting is the basic process that unblocks the boot loader which in turn privileges user to have some high level modifications inside.

In order to root your P360, you will have to follow one very simple tutorial. I am going to explain that tutorial here. But at first let me alert you about some rooting cons. Rooting will sadly kill your P360’s warranty which is the saddest thing for any new user. Secondly it might inject some bugs inside which eventually affect the overall system performance. In worst cases it might brick your device which is like suicide for your smart tablet. But if you have made your mind to go with rooting then here I am giving all the tips.

How to root Micromax Funbook Talk P360
1. Charging should be up to 70% minimum.
2. All data must be back upped properly.
3. Now download and extract the rooting tool on your desktop.
4. Go to settings menu (on tablet) and see the development part. Tick USB Debugging there.
5. Now connect it to computer through USB cable.
6. Go to extracted folder and open RunMe.bat file.
7. Press 1 and follow other onscreen instructions.

After following all the instructions, you have rooted your Funbook Talk P360 and now you can enjoy all high end activities inside this simple machine.


ADVERTISMENTS

How to root Micromax Funbook Alpha P250 with super one click root tool


Micromax Funbook Alpha P250 is an old smartphone from MMX. But still it is ready to fight against all champions at its price slot. It is a low cost tablet which has 7 inch capacitive touch screen with 800x480 pixels resolution. It runs on Android 4.0 ICS OS which can be even upgradable to Android 4.1 Jellybean (I’ll tell later how to do this).

It is powered by a single core 1 GHz processor with 512 MB RAM and Dual Mali-400 GPU. Such processor specs are rarely there in other tablets from MMX. It allows users to access 3G tablet through USB Dongle, which is again a cool option for internet lovers. Rest all specs are usual.
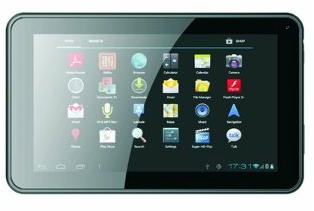
It is the only tablet from MMX that has received various Custom developments from ROM developers. Again MMX has not revealed any update for Alpha P250 which shows lots of things about company. But still you can apply those updates of your own without any official help.

These updates will smooth your user experience with latest software features and all. Rooting itself is a great tool to make changes from the official level. Without rooting, your device is like a slave which performs only according to official options. But after rooting, you become the real owner of your device. Rooting will allow you to make changes on the root level which includes upgrading OS level, CWM installations, high end games installation etc.

So I think you have understood the real meaning of rooting now. But everything has some cons. Same is the case with rooting. Along with giving such smooth features, rooting comes with some risks too. It voids your device warranty completely and even bricks it sometimes. You can avoid such risks by following all the instructions carefully.

How to root Micromax Funbook Alpha P250
1. Charge your Alpha to 70% minimum.
2. Backup all the data.
3. Now download Rooting Tool to your desktop.
4. Go to Settings>>Developers option and enable USN debugging.
5. Now connect your Alpha to computer through USB cable.
6. Open the downloaded tool and select Root option.

Now wait for some time till rooting gets finished completely. After this you can enjoy custom Recovery’s, ROMs etc. (stay tuned with coming articles for that).


ADVERTISMENTS

How to root Micromax Bolt A27 with some effective tools


Talking about Micromax Bolt A27 then it houses justified features at its price slot. But I think you are not very happy with those usual features. You surely want some extra privileges in your device. So be ready as here I am going to tell how to root Micromax Bolt A27 with some easy tools. This rooting will end up you with lots of excitement and new features (if followed properly).

But before that let we have a general discussion. Bolt A27 houses 3.5 inch small display. This display is perfect according to its price slot. Also you can’t make any changes with this display using rooting or any similar tool. So no discussion about this point. It runs on Android 2.3 Gingerbread OS which is surely the matter of great concern. Moreover, it can be rectified/upgraded using this rooting tutorial. I think Micromax is not going to launch any official update for Bolt A27 which means you have to take help form custom ROMs only. But for that you need your device to be rooted first. So this tutorial will help you there.

It is powered by a Spreadtrum SC6820 chipped 1 GHz processor with 256 MB RAM. You can’t make major changes with processor but surely you can speed it a bit up (only if you are a professional). Other features are very common which you will see in all the devices.

Now let me bring some main points to your concern. Rooting is an un-official process that comes with some risks like bricking, bugs etc. But if you carefully follow all the steps then there are very few chances of such risks. But please note that neither me nor Micromax will be held responsible for any accidental cases.

How to root Micromax Bolt A27
1. Download Moborobo and unlock root tool to computer.
2. Now with help of USB cable, connect your A27 to computer.
3. Now ensure connection worth through Moborobo tool. Open it, if it shows device is connected successfully then go to step 4 or in any other case, please connect and check it again.
4. Now open Unlock Root app and select the Root Option there.
5. Now select your phone (MMX A27) from the list and choose root your phone option.
6. Reboot it after that.
7. Now open App Drawer. If you find SuperSu app there then it means that your A27 is rooted. Otherwise you have to perform the complete tutorial again.


ADVERTISMENTS

[Step by Step] How to root Micromax Funbook Talk P362


Micromax Funbook Talk P362 features a 7 inch standard screen with 800x480 pixels resolution that supports full 16M colors. It is a high end piece from Micromax that comes with superb specs. This tablet is different from other MMX tablets. The best thing about this tablet is its price. It features some of the best features at best minimum cost.

It operates on Android 4.1 Jellybean OS with single core Cortex A9 chipped 1 GHz processor having 1 GB RAM. Having Cortex A9 chipped processor with 1 GB RAM is something very interesting. It retails at Rs. 6,700 approx which makes it further interesting.

So specs wise, it seems to be a high quality piece. But being a human being we need something additional all the times. We are never satisfied with the thing we have. Same is the case with digital gadgets too. Here comes the rooting to play. Rooting will give you permissions to make some custom changes that will magnify overall features.

But please note rooting may even lead to some errors like bricking, bug injections etc. Also it will void your P362s warranty which is a bad sign for new customers. There are very thin chances of getting that warranty back again. So please be sure to check all pros and cons of rooting before this tutorial. So let’s start.

How to root Micromax Funbook Talk P362
Follow these steps:
1. Charge your Talk P362 to minimum 70%. It should not interrupt during rooting process.
2. Backup your contents through some restore and backup app. You can easily find one from Play Store. I will recommend you to go with apps like Titanium Pro or something like.
3. Now download this rooting tool to your PC.
4. Place this tool to Desktop and extract it there.
5. Now connect your tablet and PC with USB cable. Please connect it in USB debugging mode. You will find it in settings menu of tablet.
6. Now go to the extorted folder and open RunMe.bat file.
7. Press 1 on the prompt thereafter.

Now let the things happen automatically. It will take around 3-5 minutes for rooting process. After you receive notification regarding rooting success (like rooting is completed or something like) then reboot your tablet. After rebooting your tablet, you are ready to use all rooting features. Now visit the play store and start searching all rooting required apps and games.


ADVERTISMENTS

How to root Micromax Funbook 3G P560


Do you know you can easily root your Micromax Funbook 3G P560. All you need to have is simple internet connection with one PC and USB cable. If you have these three things then you are anytime ready to root your tablet.

The next thing you need is some fruitful tutorial which can root your P560. Talking about the company then MMX is a well-established firm now. It now deals in smartphones, tablets and phablets market mainly. Gone are the days when you have to struggle hard for finding the service stores of MMX. Now if you live in a mediocre city/area then you will easily find one in your locality. This shows their dedication and hard work.

Micromax Funbook 3G P560 is a smart piece from MMX which supports a 7 inch capacitive display. It runs on Android 4.0 ICS OS with a single core 1 GHz processor having 512 MB RAM. It houses dual cameras which is a plus point for any 7 incher.

The thing I love most about this tablet is its support for 3G SIM. It supports 3G SIM facility which can be ultimately used for making voice as well as video calls. After rooting, you are further going to enhance its features. After rooting you will be even able to speed up its processor (minor changes, if you know basics of Java and Android). You may even make it compatible with some very high end games that are otherwise not supported with usual P560.

But please note that rooting will void your warranty which is very hard to retrieve. So please be careful before trying this rooting. This process may even dead you tablet if you don’t follow instructions carefully. Now let we have a look at basic rooting tutorial.

How to root Micromax Funbook 3G P560
1. First of all download and extract this tool on your PC. It is the rooting tool that will help you later.
2. Now make USB connection between your PC and mobile. Go to Settings menu of tablet and choose USB Debugging Connection.
3. Now open the extracted folder.
4. After this you will see one RunMe.bat file there. Open that.
5. Now you will get one command prompt.
6. Enter 1 there.

In general cases, only this step is needed but if it requires some more steps to be done then it will intimate you automatically. So now you have rooted your P560.


ADVERTISMENTS

[GUIDE] How to root MMX Funbook Pro P500


Micromax Funbook Pro P500 can now be rooted easily with a simple tutorial. Here I am going to explain that simple tutorial. But at first let we have some general talks. So Funbook series from MMX is dedicated to tablets only.

Funbook is a popular name in Indian tech world. It basically contains a series of Android tablets that are very rich in specifications. There was a time when this Funbook series was alone in race but today it is surrounded by lots of other healthy competitors.

Sadly because of Canvas and other smartphone series, MMX is not able to focus strongly towards Funbook series and we have not seen any tablet from MMC since very long now. They are focusing on Phablets these days. But this doesn’t mean we will not offer something for Funbook users. Here in this portal I am going to cover all development part about Funbook tablets. So stay tuned for updates about your Funbook model.

Today I am going to cover rooting about Micromax Funbook Pro P500. This rooting is going to give you all the fun which you expect from a high end smart device. We all expect superb gaming experience from a device like tablet but sometimes we are unable to download our favourite games because of software compatibility. This is the main thing where rooting come to play. Rooting will allows you to manage your P500 according to your choices and concepts.

How to root MMX Funbook Pro P500
1. Download and extract this rooting tool to your computer's desktop.
2. Now take the USB and connect your Pro P500 to computer. If possible then please connect it in USB debugging mode (you will find options in settings menu).
3. Now go to the extracted folder and open RunMe.bat file.
4. After this step, you will receive various on screen instructions.
5. Follow them carefully (like press1 for normal boot etc).

That’s it! Now your Funbook Pro P500 is rooted completely. You can even check its validity from Root Checker App from lay Store. Please note that rooting will void your Funbook’s warranty and may even brick it completely. So please follow these steps carefully as neither me nor Micromax will be responsible for such type of damages.


ADVERTISMENTS


Copyright @ 2013 Root Micromax.