Showing posts with label Micromax. Show all posts

How to root Micromax A116 Canvas HD


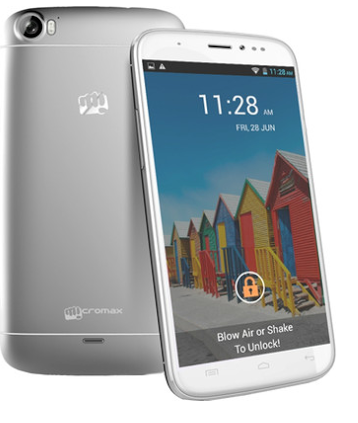
Micromax A116 Canvas HD is one of the most important smartphone in the entire journey of MMX that has helped them to reach at a stable stage on which they are performing now. Canvas HD is one of the first quad core phablet that has motivated other companies to bring their quad core pieces in the Indian market. One of my friend is using Micromax Canvas HD for 5-6 months now and till today he hasn’t faced any kind of bugs with his phone (despite of using lots of apps and games). So all in all it is a superb phone at low price tag that has become the first choice of all quad core lovers in India.

Specification wise it wears a 5 inch PIS LCD screen with 1280x720 pixels resolution. It shows vibrant colors which are efficient than other smartphones of similar class. It runs on Android 4.2 Jellybean OS (latest model) with the power of a quad core 1.2 GHz processor paired up by 1 GB RAM. I have myself experience the power of its processing system. As a performance test, me and my friend has executed 6 continuous apps/downloads on Canvas HD and Canvas 4. Although Canvas 4 was slighter better but Canvas HD performed all the tasks very well which were perfect according to its price tag.

Its 8 MP rear and 2 MP front facing cameras further magnifies its performance with 3G support. So all in all it is one of the best and reliable choices for all medium budget smartphone seekers. It could even beat devices like Galaxy Grand when compared on specification basis.

In spite of having such wonderful specification set there is still a chance of improvement. You can magnify its performance by rooting it. After rooting you can install following things on your Canvas HD:

• Latest ROMs (Android 4.3 Jellybean or Android 4.4 KitKat)
• Recoveries
• Apps with rooting permission
• Lots more

Apps with rooting permission include some very high end apps that can eventually transform your smartphone completely. These can help you modifying your phone from speed, security measures.

How to root Micromax A116 Canvas HD

At first download and install PDANet from here and after that please follow these instructions from here. It is a simple procedure that asks you to download and use a customized tool on your computer. So you are advised to carry Computer (with internet facility), your smartphone and original USB cable along with you.

ADVERTISMENTS

How to root Micromax Canvas Blaze MT500


Micromax Canvas Blaze MT500 is one of the latest MMX smartphone that is stuffed with some powerful and usual MMX specifications. Micromax is promoting it well on various medias/platforms. It is a dual SIM smartphone with the support of GSM and CDMA. Frankly speaking then this smartphone latches somewhere with its specs (in accordance to its price). It is a standard Jellybean phablet that occupies a 5 inch 954x480 pixels screen. It supports 262K colors only. It is really a bad indication for a device called “SMARTPHONE”.

It is powered by a 1 GHz dual core processor with the support of 768MB RAM. 768 MB RAM again seems to be somewhat less and it might create some major issues with heavy apps/loads. 8 MP rear and VGA front facing camera plays decent roles at respective places. It equips a 4 GB inbuilt memory chip that stores enough data in its on-board memory. But still if you need additional memory then you can easily do it with the help of normal SD card. Its 1850 mAh battery is supposed to give about 5 hours talk time and 5 days standby time.

This is all about this latest Micromax smartphone. You might have noted that this smartphone lacks in many features like less RAM, VGA front facing camera etc. It retails around Rs. 10,500 tag approx. Talking about phones (at this range) from other manufactures then they are offering much better specs with better quality even. But you can still match that level (level of other devices) by rooting your MMX Canvas Blaze MT500. Rooting will enable you to have custom ROMs (Android 4.3 Jellybean or Android 4.4 KitKat) live on your Canvas Blaze. This will even open the doors for special Apps that can completely transform your smartphone in a positive manner. But rooting will void your warranty which is not a good thing (especially for nerds).

How to root Micromax Canvas Blaze MT500

Rooting Canvas Blaze is a very easy task that can be done by following two simple steps (with sub-steps). Here are those 2 steps:

Step 1
Step 2

These steps will root your MMX MT500 in minutes. If you need any guidance then please ask me by commenting here.

ADVERTISMENTS

How to root Micromax Bolt A58


Micromax Bolt A58 is among the best entry level smartphone from Indian giant MMX. This smartphone shows great promises with its specs that look unique under the low price roof. This smartphone carries 3.5 inch display which is best for all kind of optimum use. It is a comparatively bigger display which can be used for watching videos, photos with better quality and resolution.

This smartphone is operated by an Android 4.2 Jellybean OS with 1 GHz dual core processing unit that is paired up with 512 MB RAM unit. These specs are simply awesome for a gadget that retails at Rs. 4,499. Rs. 4,499 is the current price of MMX Bolt A58 and it is one of the best smartphone at its price range. It is a 3G phone with quality connectivity tools like Wi-Fi, Bluetooth and all.

For the camera unit, manufactures have stuffed 2 MP rear camera at its back panel. Sadly no front facing camera is there which somewhere decays the use and experience of 3G enabled system. It comes with the option of 32 GB expandable memory that can turn it into a real giant (memory aspect). It equips a 1200 mAh battery for quality backup service.

If we compare these specs with its price then it seems to be a complete worth phone that utilizes every single penny of its price. But still you may have noted some apps (on Play Store) that requires rooting access for download. Here I am going to give you a procedure about how to root MMX Bolt A58 which is required with special cases like ROM upgrades, Firmware’s upgrades etc Rooting can help you in various ways. Micromax is also introducing Android KitKat update for 11 of its Canvas smartphones. Sadly it will not be for Bolt A58.

How to root Micromax Bolt A58

I have written a working tutorial for MMX Bolt A67. Rooting procedure for Bolt A58 and Bolt A67 are exactly similar. You can get it from here. It is a simple procedure but if you need any assistance on any of the step then please let me know through comments.

ADVERTISMENTS

How to root Micromax A250 Canvas Turbo


With the new face and new set of specifications, Micromax has proudly launched Micromax Canvas Turbo A250 in Indian market. At present it is the current flagship of our own Indian smartphone giant Micromax. This smartphone can be taken as the extension of MMX A240 Canvas Doodle 2. Company has extended almost the entire set of specs of Doodle 2 which is superb from customer’s point of view.

I have myself used this smartphone for about 2 weeks and believe me it is one of the best MMX smartphone that I have used/tested till now. This smartphone will provide you superb full HD resolution with real time running and very smooth and fast transitions. Its quad core 1.5 GHz chipset processor with 2GB RAM will never let you experience any kind of time lags while browsing its internal functions or even during internet sessions.

It boasts a 5 inch full capacitive screen that have IPS type screen with full HD resolution support. It is a 3G smartphone with 13 MP rear and 5 MP front facing camera. Camera is stuffed with various high end features.

I know all these features seem very approaching and some of you (almost all) will be fully satisfied with these specs. But there is still a chance of improvements (particularly in ROM update sector). The thing which will help you here is called Rooting. After rooting your MMX Canvas Turbo A250, you will be able to upgrade your smartphone with latest custom firmwares/ROMs. You will also be eligible for downloading all rooting required apps that can eventually transform your smartphone into a real one. Here I am going to give you a working procedure about how to root Canvas Turbo. But please note that it will void your warranty and you will not a liable for asking for any kind of official support (that comes under warranty), so please proceed carefully.

How to root Micromax A250 Canvas Turbo

MMX Canvas A240 and A250 Turbo are built on almost similar platform. I have already shared one procedure for rooting Canvas Doodle 2. You can check it from here. All the steps and downloading files are similar for both the smartphones. Please report errors (if any) as comments.

ADVERTISMENTS

How to root Micromax A74 Canvas Fun


Micromax is on the way of adding new smartphones/phablets to its Canvas series. Now it has added MMX Canvas Fun A74 to its portfolio. Talking about the specs then it is a high end smartphone that captures a 4.5 inch 854x480 pixels capacitive touch screen. It is a dual core smartphone that works with 1.2 GHz clocking and 512 MB RAM.

It is a dual SIM (GSM+GSM) smartphone that equips a 5 MP rear and VGA front facing camera. You can use front facing camera for self portrait and video chat purpose. It comes with 2G/3G, Wi-Fi, Bluetooth and USB connectivity. All the connectivity tools are high enough for providing a world class connectivity experience. 1500 mAh battery provides about 6 days standby and 5 hours talk time for standard networks.

Talking about the conclusion, then it completely verifies its price sticker (Rs. 750 approx). But you can still improve its overall specs to great extent. All you need to do is to root it. You can root it within minutes with a very easy to use tool.

After rooting, you will be able to host some custom apps (very high end in nature) on A74 that requires rooting permissions. These apps will allow you to manage various things to next level. It includes better clocking, file management, security etc. All in all, rooting will upshift your Canvas Fun to further heights. But it will void your warranty which is the only con of rooting process. At present (Sep 2013), Canvas Fun is a new piece. So it might be somewhat risky to root it. But if you still want to proceed, then here I am giving you the complete procedure.

How to root MMX Canvas Fun A74

1. Download Bin4Ry to desktop. Extract it on desktop or some other location which you can remember later.
2. Now connect A74 to computer and open the RunMe.bat file in the extracted folder.
3. Now in the command prompt, enter “1” for initiating the rooting process.

That’s it! You have rooted your Canvas Fun. Now simply reboot it and start enjoying all the custom features. You can ensure the rooting status from Root Checker app. You can easily find it on play store.

ADVERTISMENTS

How to root/un-root Micromax A240 Canvas Doodle 2


Micromax A240 Canvas Doodle 2 is the biggest smartphone from Micromax (screen wise). It is the MMX flagship after A210 canvas 4. It houses a 5.7 inch wide screen that was not seen with any other Micromax phablet/smartphone. Till now MMX was fully glued to 5 inch screens only. For the very first time they have tried such gutty thing. According to many tech gurus, Canvas Doodle 2 is launched for competing with Galaxy Note series of Samsung (especially Galaxy Note 2) and it can be taken as the Indian version of Galaxy Note 2. To some extent it seems to be quite true.

Its screen wears 1280x720 pixels HD resolution which is sufficient for any smart class gadget. It runs on Android 4.2.2 Jellybean OS which is stocked with all latest software features. It is upward compatible with canvas 4 (on software aspect) means like Canvas 4 it too houses smart features like blow to unlock, smart stay, video pause etc.

It is powered by a quad core 1.2 GHz processor with 1 GB RAM. It is the like trademark of all Canvas quad core phablets. All are clocked on same frequency with similar RAM. Other feature includes 12 MP rear, 5 MP front facing cameras, dual SIM compatibility, 2600 mAh battery etc. so all in all it is a nice piece that has real wide screen.

I know we are never satisfied with the thing we have. Same is the case with electronic gadgets. We always want something additional. In case of MMX Canvas Doodl2, it can be made possible with help of rooting. Here I am going to cover a very simple rooting tutorial for Canvas Doodle 2 which will root it in minutes. But please not it will void your warranty which is not a good thing now (as it is a new piece currently). So this tutorial is not for all the users. Please try it on your own risk.

How to root Micromax A240 Canvas Doodle 2

1. Download and extract the Bin4ry tool to computer.
2. Enable USB as Debugging (from Settings>>Development menu) and connect Doodle 2 to computer via USB cable.
3. Go to extracted folder and open RunMe.bat file.
4. Wait till you see command prompt on your computer’s screen.
5. Enter “1” now.

Now you have followed all the steps which will root your Canvas Doodle 2 successfully. If you want to un-root it then you will have to press “x” in place of “1” in 5th step.

ADVERTISMENTS

How to root Micromax Funbook Infinity P275: complete process


Micromax Funbook Infinity P275 is a smart tablet among all Funbook’s by Micromax. Like other tablets, it is too a source of well features specs that are moulded with eye catching design. From the specs point of view, it comes with a 7 inch TFT LCD display that generates views at 800x480 pixels resolution.

It runs on Android ICS OS. MMX has kept all its tablets (almost) glued with Android ICS OS. This is the main reason why people look for rooting and custom ROMs for them. After announcing these handy featured machines, MMX used to forget their after launch developments. They are focusing only on Canvas series these days. That is good for Canvas users but what about Funbook users? Are they not eligible of such timely updates? Or they have done some crime because of what MMX is not awarding them any official update? Whatever be the reason but one thing is sure that MMX will never care about such gadgets. But don’t worry here comes the custom developers to play.

Now you can root your Micromax Funbook Infinity P275 with a custom developed tool. Here I am going to discuss that tool in detail. But please remember that it will void your warranty which means no more official claim after rooting. But talking about the features then rooting will add extra protection, better speed to your P275. Moreover you will be able to manage its content with professional tools. So all in all rooting is a 50-50 game where you have to lose something for getting better access. Also please follow all the steps very carefully. Rooting is a dangerous process that might even damage your tablet.

How to root Micromax Funbook Infinity P275

1. BATTERY SHOULD BE AT LEAST 70%.
2. USB as debugging must be ticked in your tablet. To tick it, go to Settings>>Developments menu.
3. Now download the rooting tool from here. Download it to your computer.
4. Connect your P275 with computer through USB chord. Try to use orginal USB here.
5. Extract the downloaded rooting folder and open the RunMe.bat file (you will find it in the extracted folder).
6. Now press “1” in the command prompt you will get thereafter.

That’s it! Rooting process will now start. Just wait for it to get finished. Now remove the USB chord and reboot your Micromax Funbook Infinity P275 again. You may even check rooting status with help of Root Checker app from Play Store.


ADVERTISMENTS

How to root Micromax A34 with Bin4ry


Micromax A34 is an entry level smartphone by Micromax. It hasn’t received the kind of applauded response that every MMX smartphone used to receive. But still people will buy it. Indian market is currently flooded with all price slotted smartphones. It includes low as well as high price slots. MMX A34 retails at Rs. 4,400 approx. It is a competitive price slot that is crowded with plethora of gadgets from various companies. Talking about the best gadgets (in this slot) then Intex and Lava has best offerings with 4.2 Jellybean OS.

Talking about MMX A34 then it comes with a 3.9 inch screen that is coupled with a single core 1 GHz processor having 1 GB RAM. It runs on Android 2.3 Gingerbread OS. There is no other special feature which can be discussed with proud. All in all it is a below average smartphone from MMX that is not up to mark even.

But still you can modify its features a little up with a process called rooting. Let me elaborate it to you. Rooting is a technical name that is given to in lock the boot-loader of any machine. Official boot loader contains some inbuilt programs that are first accessed by system when it is turned ON. It is the boot loader which is responsible for major settings in the system. If we can somehow un-block this boot loader then we can allows some custom high end programs to be installed in our system (which were previously blocked by boot loader). This is the main reason why rooting is so important.

Rooting will give you the chance to modify your phone’s security, clocking etc. With rooting, you are even eligible to download some very high end games that require supreme settings although. So now let me explain a simple tutorial. Before that, please install PDANet drivers on your computer and mobile. You can install them from here.

How to root Micromax A34
1. Download Bin4ry to computer and extract it on desktop.
2. Now in your mobile, go to Settings>>Developers and select USB as Debugging option.
3. Connect it to computer through USB cable.
4. Open the extracted file and further open the RunMe.bat file.
5. Now press 1 on the command prompt and enter there.

It will begin the rooting process which will get completed after 2-3 minutes. After rooting, reboot your A34 and install Root Checker App from Play Store. It will check the proper status of your mobile i.e. whether it is rooted properly or not.


ADVERTISMENTS

Root Micromax Bolt A35 with complete step by step tutorial


If you own a Micromax Bolt A35 then by this time you are probably looking for some rooting tutorials for it. Main of this blog is to cover rooting guides for all the Micromax smartphones. I just want to make it one stop for all rooting related queries about MMX mobiles. Till now, I have covered several MMX smartphones. Today I am going to add one more MMX mobile dubbed which can be rooted easily.

Talking about the development world then MMX is still recognized as third level company. If you are looking for some exclusive tool for rooting your A35 Bolt then sadly you will nothing. I am following MMX development since long now, but I haven’t seen any exclusive tool for (rooting) any MMX smartphone. You will have to take help of some global tools that doesn’t even delivers 100% accuracy. But still if we look upon the rooting advantages then I am sure you will try such global tools to.

Rooting will help you customize following sectors of your mobile:
• Security
• Better file management
• CPU can be accelerated
• High end games
• Custom ROM firmware’s
• Recoveries
• Better backup
• Lots more

Talking about Micromax Bolt A35 then it comes with very average specifications that are worth its every single penny. It includes 4 inch WVGA capacitive display with Android 2.3 Gingerbread OS and Cortex A5 1 GHz processor having 256 MB RAM. Till now you must have got the proper need of rooting. Rooting will help you upgrade your OS and CPU level. OS upgrade depends on Custom ROMs. Sadly no one knows when custom ROMs for Micromax Bolt A35 will be available but you can anytime accelerate your CPU with apps like SetCPU.

How to root Micromax Bolt A35
1. First you have to install proper drivers for your A35. You can do it through PDANet tool. Check complete download and installation part from here.
2. After this download and extract rooting package on your computer.
3. With help of USB cable, connect your A35 with computer.
4. Go to extracted folder. There you will see 4 files. Open the RunMe.bat file there.
5. Now you will be redirected to a command prompt where you will have to press 1.
6. Now rooting process will start. Once it will get finished, you will be invoked automatically through some pop-up.

Now install Root Checker App from Play Store and verify whether your mobile is rooted or not.


ADVERTISMENTS

How to root Micromax Superfone Pixel A90s Smartphone


Micromax Superfone Pixel A90s is a super series smartphone from Micromax. If you carefully observe its features then you will find that it lags somewhere from other high end devices from Micromax. But the time when it was announced, it was a complete package with plethora of features. Today its features might seem out-dated but that doesn’t means it is out-dated from customers approach.

Talking about its specs, then it comes with a 4.3 inch Super AMOLED WVGA touch screen that provides very wide viewing angles. It supports full 256K color depth with capacitive touch support. It runs on Android 4.0 ICS OS. This is the main thing why it appears to be out-dated now. Though more than 60% Android machines are still running on Android 2.3 Gingerbread OS but when it comes to new launches then most of them are couple with Android 4.1 Jellybean minimum OS chip. It is powered by a dual core processor that is clocked at 1 GHz clock with 512 MB RAM as main storage. This is sufficient for Android ICS OS.

8 MP and VGA cameras are embedded on rear and front side respectively. The best thing about this phone is its connectivity tools. It comes with latest connectivity features that make it a super connectivity supported machine. To house all these features efficiently, it is stacked with a 1600 mAh battery which delivers best output in all the conditions.

From the above discussion, you can clearly see that this phone requires some development in certain areas (especially at software end). If you want to apply any such changes in your A90S, then you will have to take help of rooting. Rooting will give you extra privileges to modify all such shortcomings. So here I have decided to give a proper rooting tutorial for all such users.

How to root Micromax Superfone Pixel A90s
Follow these steps carefully:
1. Download the Bin4ry tool to PC’s desktop and extract it.
2. Enable USB Debugging in your A90S and connect it to computer via USB cable. You can find USB Debugging option in Settings>>Development menu.
3. Now go to extracted folder and open RunMe.bat file.
4. Now you will get one onscreen command prompt as shown here:

5. Press 1 here.
6. Now wait for the process to get finished.

You have rooted your Micromax Superfone Pixel A90s, now just wait for custom ROM releases so that you can fully use your rooted machine.


ADVERTISMENTS

How to root Micromax A88 Canvas Music with one of most effective tool


Rooting is a pleasurable thing that always comes with advanced options and superb control. Few months back, rooting was limited to high budgeted devices like Samsung, Sony, HTC etc only but today rooting is also available for entry level devices like Micromax etc. Today you can root almost every Micromax Android Smartphone that comes with some minimum particular set of features. Till now I have explained rooting tutorial for various MMX smartphones. Today I am going to share tutorial for one more MMX smartphone. The smartphone I am going to discuss today is Micromax A88 Canvas Music.

This smartphone is developed for music lovers only. Moreover company provides one JBL headset free with new models. It shows how dedicated it is toward music niche. This super smartphone is wrapped with 4.5 inch TFT LCD display that outputs 854 x 480 pixels resolution. It runs on Android 4.1 Jellybean which though provides good software features but if you are keen enough to think about future then you will find them boring and will always look for a chance to upgrade them. If you fall in this category then rooting process is best suited for you. Stay tuned as I will share complete tutorial about rooting too.

It is powered by a dual cored CPU 1 GHz processor coupled with 512 MB RAM. I still remembered some reviews in which it was said that this device will perform very low on performance scale because of poor RAM. But thankfully all that was a rumour and it didn’t score that low too. I know 512 MB RAM is a poor thing but it is enough for its prebuilt features. It is even capable of holding some higher end features. Rooting is the key to all such high end features.

How to root MMX A88 Canvas Music
1. Download the rooting package on computer’s desktop and extract it.
2. Now take the USB chord and connect A88 with computer.
3. In the extracted folder, open the RunMe.bat file.
4. Now press 1 for normal process.

That’s it! You will be informed about rooting status by a popup. In case everything goes well then reboot your mobile and start using all high end features. And in case, it shows some errors or something like then you will have to repeat the same procedure again.


ADVERTISMENTS

How to root Micromax Funbook Talk P360 through offline tool


Micromax Funbook Talk P360 is an Android 4.0 ICS tablet from company. This tablet comes with normal specs that include Cortex A8 processor with 1 GHz CPU and 1 GB RAM. Here 1 GB RAM is something attractive which surely takes multi-tasking pleasure to next level. Along with these two features, it also comes with 2 GB ROM, 2 MP rear and VGA front facing camera.

It provides a healthy user interface through 7 inch WVGA screen. It couples 2G voice calling facility in 7 inch machine which is a wonderful thing. It is one of the best voice calling enabled tablet by Micromax (even all companies in India). It retails at normal price (Rs. 6,700) which further magnifies all the things further. It also gives the option to access 3G speeded internet through USB dongle.

So all in all it is a super device which contains most of the essential features inside. But if you still want some next level customizations in your MMX Funbook Talk P360 then you will have to take help of rooting. Rooting is the basic process that unblocks the boot loader which in turn privileges user to have some high level modifications inside.

In order to root your P360, you will have to follow one very simple tutorial. I am going to explain that tutorial here. But at first let me alert you about some rooting cons. Rooting will sadly kill your P360’s warranty which is the saddest thing for any new user. Secondly it might inject some bugs inside which eventually affect the overall system performance. In worst cases it might brick your device which is like suicide for your smart tablet. But if you have made your mind to go with rooting then here I am giving all the tips.

How to root Micromax Funbook Talk P360
1. Charging should be up to 70% minimum.
2. All data must be back upped properly.
3. Now download and extract the rooting tool on your desktop.
4. Go to settings menu (on tablet) and see the development part. Tick USB Debugging there.
5. Now connect it to computer through USB cable.
6. Go to extracted folder and open RunMe.bat file.
7. Press 1 and follow other onscreen instructions.

After following all the instructions, you have rooted your Funbook Talk P360 and now you can enjoy all high end activities inside this simple machine.


ADVERTISMENTS

How to root Micromax Funbook Alpha P250 with super one click root tool


Micromax Funbook Alpha P250 is an old smartphone from MMX. But still it is ready to fight against all champions at its price slot. It is a low cost tablet which has 7 inch capacitive touch screen with 800x480 pixels resolution. It runs on Android 4.0 ICS OS which can be even upgradable to Android 4.1 Jellybean (I’ll tell later how to do this).

It is powered by a single core 1 GHz processor with 512 MB RAM and Dual Mali-400 GPU. Such processor specs are rarely there in other tablets from MMX. It allows users to access 3G tablet through USB Dongle, which is again a cool option for internet lovers. Rest all specs are usual.

It is the only tablet from MMX that has received various Custom developments from ROM developers. Again MMX has not revealed any update for Alpha P250 which shows lots of things about company. But still you can apply those updates of your own without any official help.

These updates will smooth your user experience with latest software features and all. Rooting itself is a great tool to make changes from the official level. Without rooting, your device is like a slave which performs only according to official options. But after rooting, you become the real owner of your device. Rooting will allow you to make changes on the root level which includes upgrading OS level, CWM installations, high end games installation etc.

So I think you have understood the real meaning of rooting now. But everything has some cons. Same is the case with rooting. Along with giving such smooth features, rooting comes with some risks too. It voids your device warranty completely and even bricks it sometimes. You can avoid such risks by following all the instructions carefully.

How to root Micromax Funbook Alpha P250
1. Charge your Alpha to 70% minimum.
2. Backup all the data.
3. Now download Rooting Tool to your desktop.
4. Go to Settings>>Developers option and enable USN debugging.
5. Now connect your Alpha to computer through USB cable.
6. Open the downloaded tool and select Root option.

Now wait for some time till rooting gets finished completely. After this you can enjoy custom Recovery’s, ROMs etc. (stay tuned with coming articles for that).


ADVERTISMENTS

How to root Micromax Bolt A27 with some effective tools


Talking about Micromax Bolt A27 then it houses justified features at its price slot. But I think you are not very happy with those usual features. You surely want some extra privileges in your device. So be ready as here I am going to tell how to root Micromax Bolt A27 with some easy tools. This rooting will end up you with lots of excitement and new features (if followed properly).

But before that let we have a general discussion. Bolt A27 houses 3.5 inch small display. This display is perfect according to its price slot. Also you can’t make any changes with this display using rooting or any similar tool. So no discussion about this point. It runs on Android 2.3 Gingerbread OS which is surely the matter of great concern. Moreover, it can be rectified/upgraded using this rooting tutorial. I think Micromax is not going to launch any official update for Bolt A27 which means you have to take help form custom ROMs only. But for that you need your device to be rooted first. So this tutorial will help you there.

It is powered by a Spreadtrum SC6820 chipped 1 GHz processor with 256 MB RAM. You can’t make major changes with processor but surely you can speed it a bit up (only if you are a professional). Other features are very common which you will see in all the devices.

Now let me bring some main points to your concern. Rooting is an un-official process that comes with some risks like bricking, bugs etc. But if you carefully follow all the steps then there are very few chances of such risks. But please note that neither me nor Micromax will be held responsible for any accidental cases.

How to root Micromax Bolt A27
1. Download Moborobo and unlock root tool to computer.
2. Now with help of USB cable, connect your A27 to computer.
3. Now ensure connection worth through Moborobo tool. Open it, if it shows device is connected successfully then go to step 4 or in any other case, please connect and check it again.
4. Now open Unlock Root app and select the Root Option there.
5. Now select your phone (MMX A27) from the list and choose root your phone option.
6. Reboot it after that.
7. Now open App Drawer. If you find SuperSu app there then it means that your A27 is rooted. Otherwise you have to perform the complete tutorial again.


ADVERTISMENTS

[Step by Step] How to root Micromax Funbook Talk P362


Micromax Funbook Talk P362 features a 7 inch standard screen with 800x480 pixels resolution that supports full 16M colors. It is a high end piece from Micromax that comes with superb specs. This tablet is different from other MMX tablets. The best thing about this tablet is its price. It features some of the best features at best minimum cost.

It operates on Android 4.1 Jellybean OS with single core Cortex A9 chipped 1 GHz processor having 1 GB RAM. Having Cortex A9 chipped processor with 1 GB RAM is something very interesting. It retails at Rs. 6,700 approx which makes it further interesting.

So specs wise, it seems to be a high quality piece. But being a human being we need something additional all the times. We are never satisfied with the thing we have. Same is the case with digital gadgets too. Here comes the rooting to play. Rooting will give you permissions to make some custom changes that will magnify overall features.

But please note rooting may even lead to some errors like bricking, bug injections etc. Also it will void your P362s warranty which is a bad sign for new customers. There are very thin chances of getting that warranty back again. So please be sure to check all pros and cons of rooting before this tutorial. So let’s start.

How to root Micromax Funbook Talk P362
Follow these steps:
1. Charge your Talk P362 to minimum 70%. It should not interrupt during rooting process.
2. Backup your contents through some restore and backup app. You can easily find one from Play Store. I will recommend you to go with apps like Titanium Pro or something like.
3. Now download this rooting tool to your PC.
4. Place this tool to Desktop and extract it there.
5. Now connect your tablet and PC with USB cable. Please connect it in USB debugging mode. You will find it in settings menu of tablet.
6. Now go to the extorted folder and open RunMe.bat file.
7. Press 1 on the prompt thereafter.

Now let the things happen automatically. It will take around 3-5 minutes for rooting process. After you receive notification regarding rooting success (like rooting is completed or something like) then reboot your tablet. After rebooting your tablet, you are ready to use all rooting features. Now visit the play store and start searching all rooting required apps and games.


ADVERTISMENTS

How to root Micromax Funbook 3G P560


Do you know you can easily root your Micromax Funbook 3G P560. All you need to have is simple internet connection with one PC and USB cable. If you have these three things then you are anytime ready to root your tablet.

The next thing you need is some fruitful tutorial which can root your P560. Talking about the company then MMX is a well-established firm now. It now deals in smartphones, tablets and phablets market mainly. Gone are the days when you have to struggle hard for finding the service stores of MMX. Now if you live in a mediocre city/area then you will easily find one in your locality. This shows their dedication and hard work.

Micromax Funbook 3G P560 is a smart piece from MMX which supports a 7 inch capacitive display. It runs on Android 4.0 ICS OS with a single core 1 GHz processor having 512 MB RAM. It houses dual cameras which is a plus point for any 7 incher.

The thing I love most about this tablet is its support for 3G SIM. It supports 3G SIM facility which can be ultimately used for making voice as well as video calls. After rooting, you are further going to enhance its features. After rooting you will be even able to speed up its processor (minor changes, if you know basics of Java and Android). You may even make it compatible with some very high end games that are otherwise not supported with usual P560.

But please note that rooting will void your warranty which is very hard to retrieve. So please be careful before trying this rooting. This process may even dead you tablet if you don’t follow instructions carefully. Now let we have a look at basic rooting tutorial.

How to root Micromax Funbook 3G P560
1. First of all download and extract this tool on your PC. It is the rooting tool that will help you later.
2. Now make USB connection between your PC and mobile. Go to Settings menu of tablet and choose USB Debugging Connection.
3. Now open the extracted folder.
4. After this you will see one RunMe.bat file there. Open that.
5. Now you will get one command prompt.
6. Enter 1 there.

In general cases, only this step is needed but if it requires some more steps to be done then it will intimate you automatically. So now you have rooted your P560.


ADVERTISMENTS

[GUIDE] How to root MMX Funbook Pro P500


Micromax Funbook Pro P500 can now be rooted easily with a simple tutorial. Here I am going to explain that simple tutorial. But at first let we have some general talks. So Funbook series from MMX is dedicated to tablets only.

Funbook is a popular name in Indian tech world. It basically contains a series of Android tablets that are very rich in specifications. There was a time when this Funbook series was alone in race but today it is surrounded by lots of other healthy competitors.

Sadly because of Canvas and other smartphone series, MMX is not able to focus strongly towards Funbook series and we have not seen any tablet from MMC since very long now. They are focusing on Phablets these days. But this doesn’t mean we will not offer something for Funbook users. Here in this portal I am going to cover all development part about Funbook tablets. So stay tuned for updates about your Funbook model.

Today I am going to cover rooting about Micromax Funbook Pro P500. This rooting is going to give you all the fun which you expect from a high end smart device. We all expect superb gaming experience from a device like tablet but sometimes we are unable to download our favourite games because of software compatibility. This is the main thing where rooting come to play. Rooting will allows you to manage your P500 according to your choices and concepts.

How to root MMX Funbook Pro P500
1. Download and extract this rooting tool to your computer's desktop.
2. Now take the USB and connect your Pro P500 to computer. If possible then please connect it in USB debugging mode (you will find options in settings menu).
3. Now go to the extracted folder and open RunMe.bat file.
4. After this step, you will receive various on screen instructions.
5. Follow them carefully (like press1 for normal boot etc).

That’s it! Now your Funbook Pro P500 is rooted completely. You can even check its validity from Root Checker App from lay Store. Please note that rooting will void your Funbook’s warranty and may even brick it completely. So please follow these steps carefully as neither me nor Micromax will be responsible for such type of damages.


ADVERTISMENTS

How to root Micromax A110Q Canvas Plus


Micromax A110Q is the updated version of popular MMX A110 Canvas 2. It is wrapped with very similar specs like A110 but still there are some features which are updated in form of A110Q. Sadly it didn’t scored that well like Canvas 2 but still it followed by a major bunch of MMX customers. After all it is an effective Canvas phablet from a company that has changed Indian market completely.

Features wise as I said earlier it can be considered as a duplicate copy of Canvas 2 with few extensions. It houses 5 inch screen with dual SIM support, 8 MP rear, 2MP front camera. You can record videos at 720p having HD quality inside. It comes with Proximity, gravity and motion sensors which provide good gaming and automotive experience. Its screen is highlighted with IPS screen which is known for providing one of the best viewing angles in complete industry.

It runs on a 1.2 GHz dual processor with 1GB RAM. It is one of the major difference which complete separates A110Q from A110 Canvas 2. 1.2 GHz processor and 1GB RAM provides Canvas Plus a blazing fast speed with superb multi-tasking experience. It runs on Android 4.0 ICS OS which is another advantage.

Now let we move to the rooting part. First question that might be coming to your mind is the need of rooting Canvas Plus? So let me brief a little. Rooting is going to unblock your mobile’s boot loader which in turn will open a treasure of high performance games, high end modifications/customizations etc. You can enjoy rooting to utmost only if you are a tech geek and programmer (little bit). Without knowledge of programming, you will have to depend on apps, ROMs from other developers which is not bad also but it might take several days, months even years for RM developers to build something for your Canvas Plus. But till then you can enjoy with some high end apps that requires rooting (from Play Store).

How to root Micromax A110Q Canvas Plus
1. Download rooting tool to computer and extract it.
2. Now connect your A110Q to your computer via USB chord.
3. Go to extracted folder and open Runme.bat file.
4. Now you will get this type of window:

5. Press 1 and enter.

That’s it! You have successfully rooted your Micromax A110 Canvas Plus. Now you can enjoy all rooting required tasks on your phablet.


ADVERTISMENTS

How to root Micromax Canvas Viva A72 with Piranhabox tool


Micromax A72 Canvas Viva is the cheapest Canvas smartphone from company. But don’t go with its price. It is wrapped with all the required features that can be stuffed for its price tag. You will not find a single guilt in its overall specs. Specs are one thing and launch after developments are second thing. Both the things are very necessary of the development of a smartphone. It should come with high end specs from company and it should receive proper attention from custom/official developers too. If a smartphone misses any of the two things then that should not be called as smartphone even.

After launch development includes, rooting, new ROMs, recovery images etc. These are required to keep user awaked about latest software tweaks in the market. Luckily MMX is becoming the brand which is heading in both the fields equally. Many people think that being cheap mobile, they can’t be updated with latest features and developments. It is a complete myth. Now you can root most of Micromax smartphones. However something is to be done with ROM development part too.

At present MMX is focusing on flagship models only. Sadly they are not developing official ROMs for all the devices. But hopefully they will divert their focus soon. Here I am going to describe a method by which you can root your Canvas Viva A72 very easily.

How to root MMX Canvas Viva A72
1. Download Piranhabox Rooting Package to your computer.
2. Extract it somewhere which can be remembered easily. Best place is desktop.
3. After extracting this tool, connect A72 with computer through USB cable.
4. Open the extracted folder and select MTK tab. After this tick USB and One Key Root.
5. Now start the rooting process by selecting “Start” button from screen.
6. After this, rooting process will start.

Once the rooting is finished, you will be acknowledged by a prompt within your computer. Remove the USB connections. Switch Off your A72 and reboot it then.

Now download Root Checker App from Play store and confirm whether your mobile is rooted properly or not. In case it is showing some errors then you have to repeat the same procedure once again. This process will void your warranty completely so please decide carefully whether you want to root your Canvas Viva or not.


ADVERTISMENTS

How to root Micromax A101 with one of the simplest tutorial


Micromax A101 is a phone which is promoted through online sources only. If you visit your nearby MMX store and ask for this smartphone then very probably store keeper will say that there is no such piece in the market. But if you carefully search various online stores, then you will easily find it there.

I don’t know the reason why they have not listed in offline stores but the thing I know is that it is doing great business for them. It was launched after MMX A110 Canvas 2. I think at present it is handed by thousands of customers and many of them want to root it somehow. I am sure you have also tried the same on some level.

Talking about the phone then A101 comes with usual 5 inch screen with Android 4.0 ICS OS. It is powered by a 1 GHz dual core processor with 512 MB RA<. If you carefully see the main features of Canvas 2 and A101 then you will find very few differences there. Even both retails at same price range. But they played a smart move by limiting it to online audience only.

After rooting your MMX A101, you will be able to house some additional fully customizable features on your usual machine. These features include some high level apps that requires rooting, all custom ROMs, recovery images etc. Developers are focused towards Canvas 2 development but I think they will soon repeat the same for A101 also. After all it to have big audience like Canvas 2.

Here I am going to discuss a simple tutorial which will help your rooting you A101 very easily. Probably it is one of the simplest methods that you will ever find about rooting your Micromax smartphone. So let’s start.

How to root MMX A101
1. From this link, download the rooting kit on your computer.
2. Extract it after downloading.
3. Connect A101 and computer with USB cable in debugging mode.
4. Go to extracted folder and open RunMe.bat file.
5. Press 1 on the command prompt where you will be redirected after RunMe.bat file.

That’s it! You have rooted your A101 successfully. Now you are eligible of trying all new features (high end) on you A101 surface. If you are a true geek then you may even give a try to all the Canvas 2 related custom ROMs (but please take a full backup of current ROM before all that stuff).


ADVERTISMENTS


Copyright @ 2013 Root Micromax.